
Release Note Updates:
Full Details
We are pleased to introduce a set of impactful updates to your CampusCare 10x, meticulously designed to elevate the efficiency of your administrative processes. These enhancements are tailored to simplify complex workflows, save valuable time, and provide you with robust tools to manage critical information seamlessly.
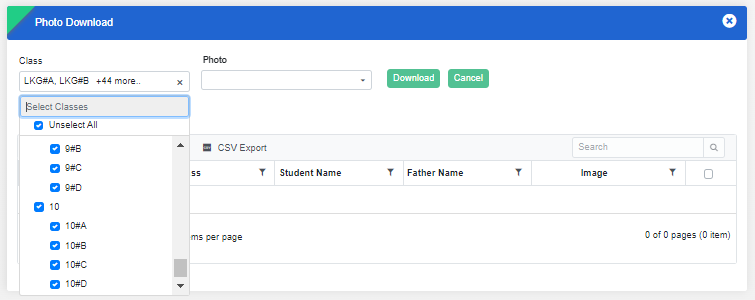
Bulk Photo Download for Multiple Classes
Streamline the process of downloading student photos by selecting multiple classes at once. This update eliminates the need for repetitive tasks, saving time during large-scale operations such as ID card generation or event preparation.
Step Wise Process on How to Download Bulk Photos
- Step 1: Navigate to the Student Information Module
- Log in to the CampusCare 10x platform using your credentials.
- Once logged in, locate the Student Information Module in the dashboard.
- This module contains various student-related features and functionalities.
- Step 2: Access the Photo Download Option
- Click on the Student Information Module to expand the dropdown menu.
- From the dropdown options, click on Photo Download.
- This will redirect you to the photo management interface where you can download student-related photos.
- Step 3: Select the Desired Class
- In the Photo Download section, locate the dropdown menu to select a class.
- Click on the dropdown and choose the desired class whose photos you wish to download.
- The system will display the photos associated with the selected class.
- Step 4: Choose the Photo Category
- In the photo selection area, identify the section labeled Photo.
- From the available options, select the type of photo you want to download:
- Student
- Guardian
- Father
- Mother
- Step 5: Select Photos for Download
- On the right-hand side, locate the checkbox next to each photo.
- Choose one or more photos by clicking the desired checkboxes.
- To download all available photos, click on the topmost checkbox, which will automatically select all photos in the list.
- Step 6: Download the Selected Photos
- After selecting the desired photos, locate the Download button at the bottom or top of the page.
- Click on the Download button.
- The selected photos will be downloaded to your device in the default format and location.
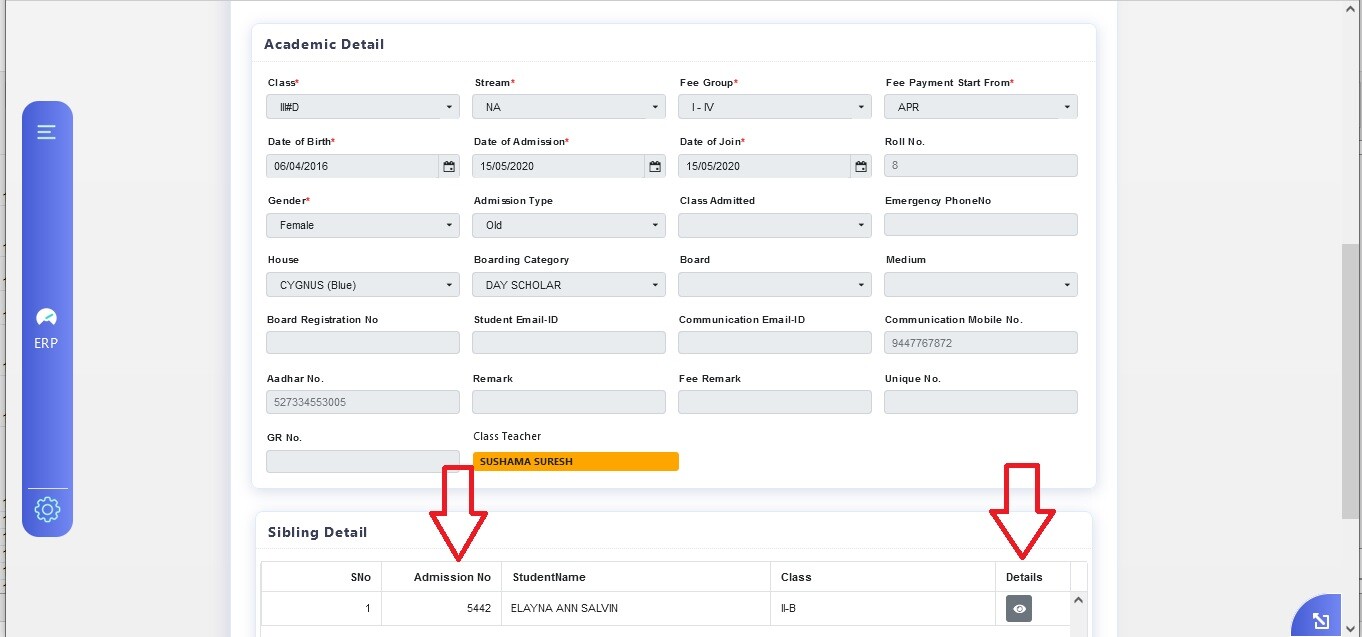
Enhanced Sibling Details Section
Access comprehensive sibling-related data with ease. The addition of an Admission Number column ensures quick identification of siblings, while the Details button allows you to instantly navigate to the sibling's complete profile within the Student Details form.
This feature is designed to improve data accessibility and accuracy, reducing the effort required for information retrieval.
Step Wise Process to Explore Sibling Detail Section
- Step 1: Navigate to the Student Information Module
- Log in to the CampusCare 10x platform using your credentials.
- Locate the Student Information Module on the dashboard and click to expand its menu.
- This module allows you to manage student-related information efficiently.
- Step 2: Access the Student Master Section
- From the dropdown menu under the Student Information Module, click on Student Master.
- This section provides tools to manage and update student records.
- Step 3: Initiate the Student Addition Process
- In the Student Details section of the Student Master, locate the plus (+) sign.
- The plus sign is positioned on the right-hand side of the Cancel button.
- Click on the plus sign to proceed.
- Step 4: Choose Between Adding a Single or Multiple Students
- After clicking the plus sign, you will see two options:
- Select Add Single to add an individual student.
- Step 5: Fill in the Required Details
- You will be directed to a new page containing a form for student details.
- Enter the required information in the appropriate fields.
- Mandatory fields are marked with an asterisk (*), so ensure these fields are filled in accurately.
- Step 6: Save the Entered Details
- Once all necessary information has been entered, review the details for accuracy.
- Click on the Save button, which is located at the top of the form.
- This action will save the student’s information in the system.
- Step 7: Edit Details If Necessary
- After saving, the entered details can be edited later if any updates or corrections are needed.
- Navigate to the relevant record in the Student Master section to make modifications.